Air-Drying vs. a Dehydrator: Preserving Wild Herbs for Winter
Air-drying or a dehydrator for your wild herbs? After thirty years in the wet Pacific Northwest, here's when I hang and when I plug in — and how I store the result.
The whole point of drying a wild herb is to stop time. A fresh nettle top is mostly water, and water is what rot and mold and mildew all need to do their work. Pull the water out, and the plant will keep its color, its scent, and most of what made you gather it in the first place — through the wet months when nothing green is growing and you’re glad you put the summer away properly.
Here on the rain-shadow side of the Olympic Peninsula I have a particular grievance with drying, which is that the air outside is almost never dry enough to do it for me. People in Arizona hang a bundle of herbs from a rafter and walk away. I hang a bundle of herbs and come back to find it gone soft and grey at the stems. So I’ve spent thirty years working out when hanging actually works up here and when I should stop fighting the climate and plug something in.
When air-drying works (and when it doesn’t)
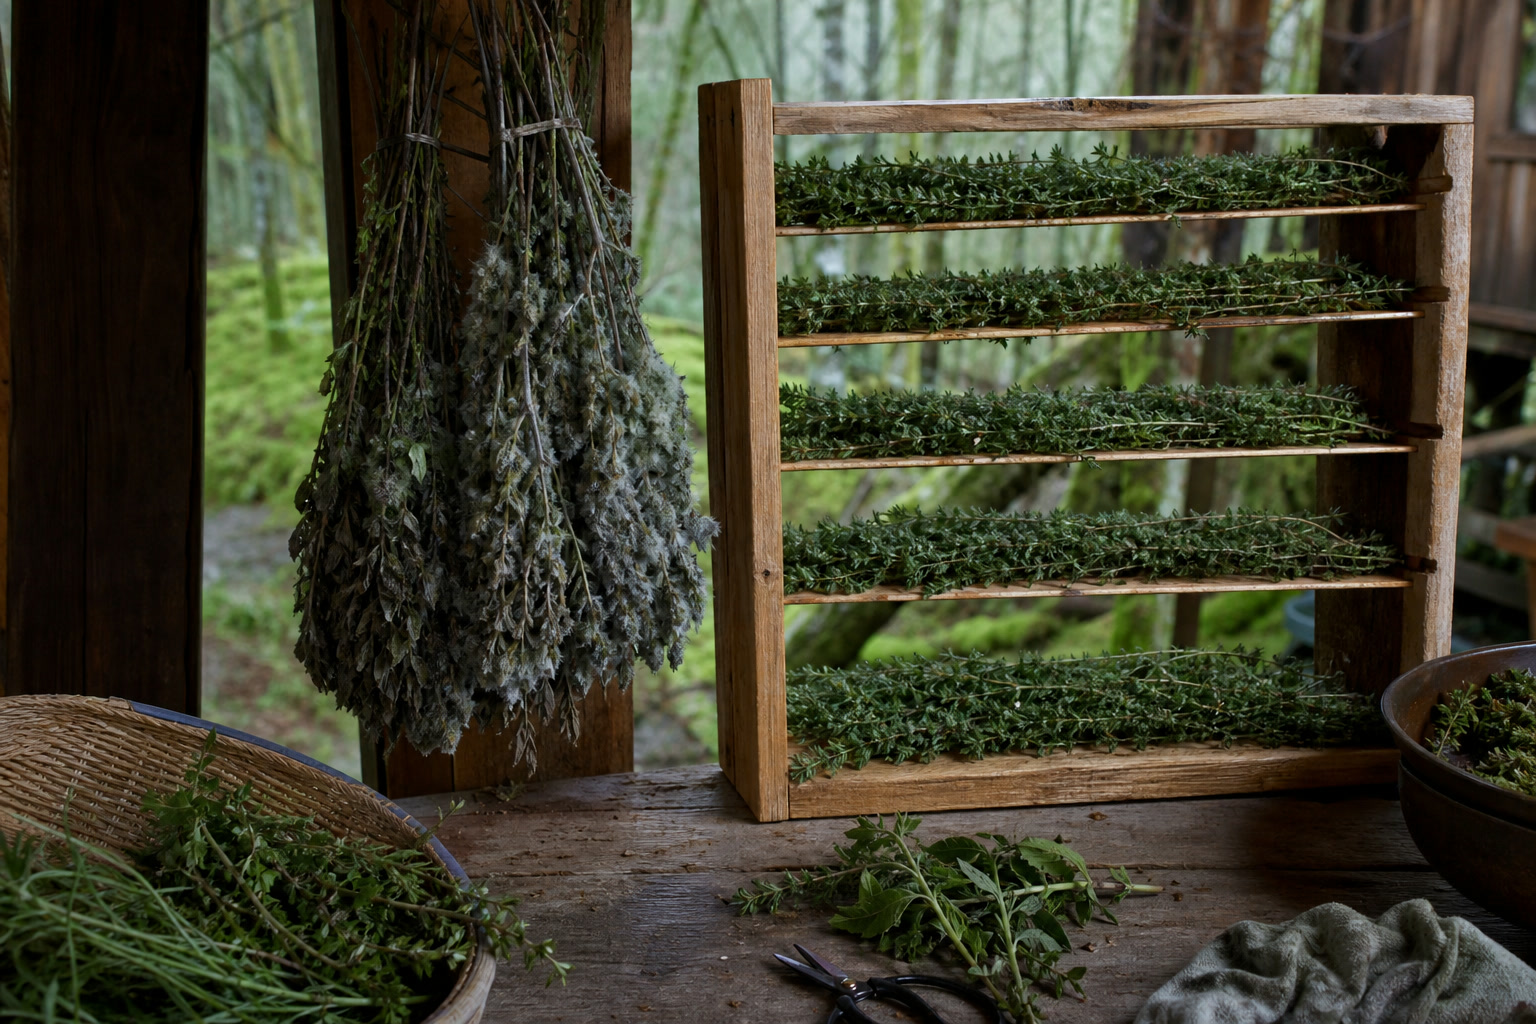
Air-drying is free, it’s gentle, and for the right plant in the right conditions it’s the best method there is. Slow drying at room temperature preserves the volatile oils that give an herb its scent — and the scent is usually the medicine, traditionally speaking. Hang a bundle of yarrow or mint or nettle in a warm, dark, well-ventilated spot, and in a week or two you’ll have brittle, fragrant, perfectly dried herb.
The catch is in the words “warm” and “well-ventilated.” Air-drying works for light, leafy material with a lot of surface area and not much moisture — the leaves and flowering tops. It does not work for roots, for thick fleshy stems, or for anything you’ve gathered in a damp week, which on this coast is most weeks. If the material can’t lose its water faster than mold can colonize it, you don’t get dried herb. You get compost.
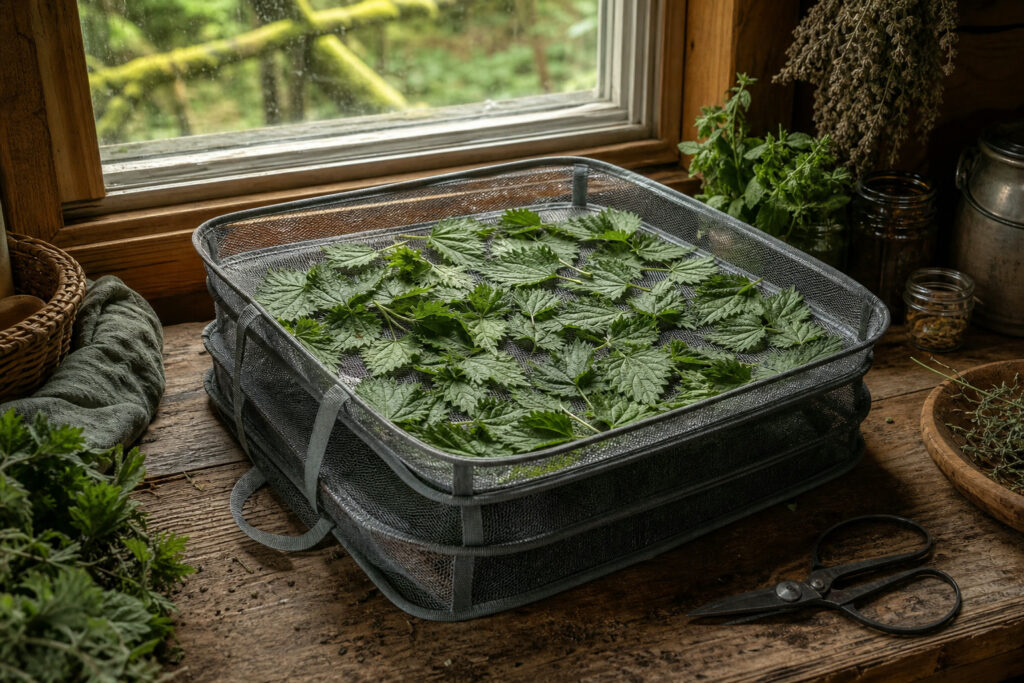
I lost a whole season’s worth of mint that way one October, hung too thick in too humid a kitchen. It looked fine on the outside. The inside of the bundle was furred grey by the time I noticed. Now I dry leafy material spread thin on a stackable drying rack instead of bundled — single layers, plenty of air on every side, the racks stacked up in a warm corner of the house where the cat can’t get to them. Spread thin, herbs dry before they spoil. Bundled thick, they’re a gamble I’ve stopped taking.
When the dehydrator earns its counter space
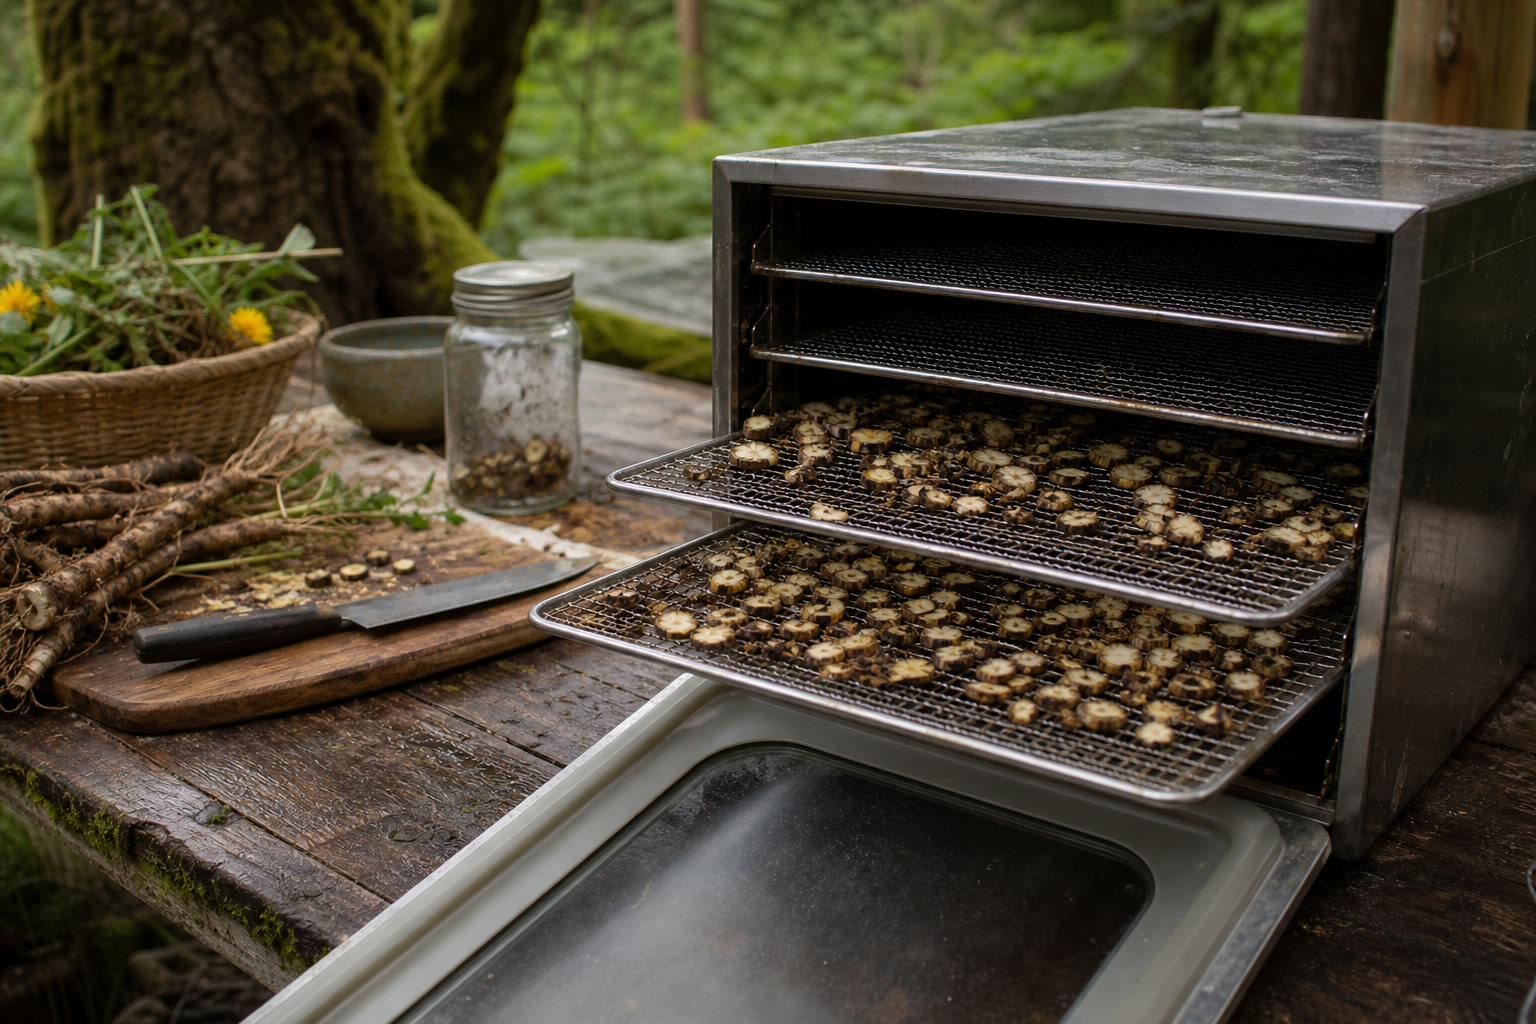
For everything air-drying can’t handle — roots, bark, fleshy material, and any harvest brought in wet — I use a dehydrator. Mine is a COSORI with stainless-steel trays, and the stainless trays matter more than people expect: I’m drying things I’ll later make into tea and tincture, and I’d rather they didn’t sit on warm plastic for twelve hours to do it. The stainless cleans up properly too, which the plastic-tray models never quite do once you’ve dried something resinous.
The argument for a dehydrator up here is simply control. It holds a steady low temperature and moves air across the trays whether or not the weather is cooperating, which on the Peninsula it usually isn’t. Dandelion root that would take two weeks to air-dry in my climate — if it dried at all before turning — is done overnight in the dehydrator and keeps its color besides.
Heat is the one thing to mind. Set it too high and you cook off the volatile oils you were trying to save, and you’ll know because the dried herb smells like nothing. I run mine low — around 95 to 105 degrees for leaves and flowers, a little warmer for roots and bark. Low and slow. The goal is dry, not toasted.
How to tell when something is actually dry
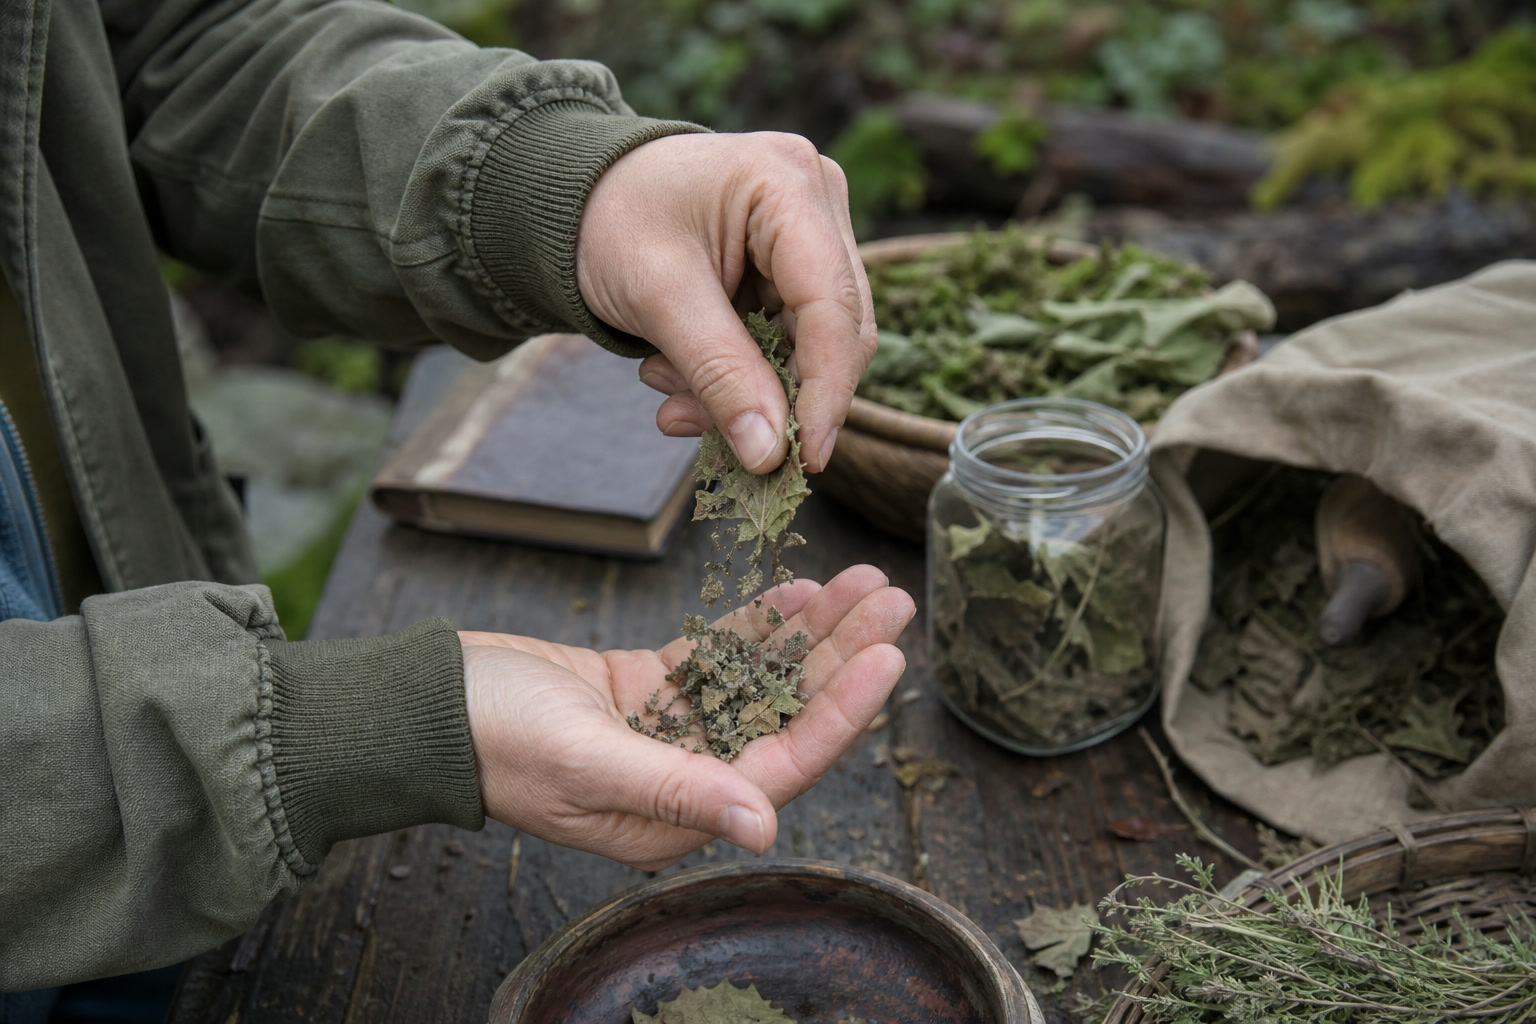
This is the step beginners rush, and a half-dried herb stored in a sealed jar is just a slower way to grow mold. A properly dried leaf crumbles when you crush it — it doesn’t fold or bend. A dried root snaps clean rather than flexing. Stems are the last to give up their water, so test the thickest part of the thickest piece, not the thin leaf that dried first.
When in doubt, dry it longer. There’s no harm in an extra day, and there’s a whole ruined batch waiting on the other side of jarring something too soon.
Store it right or you wasted the work
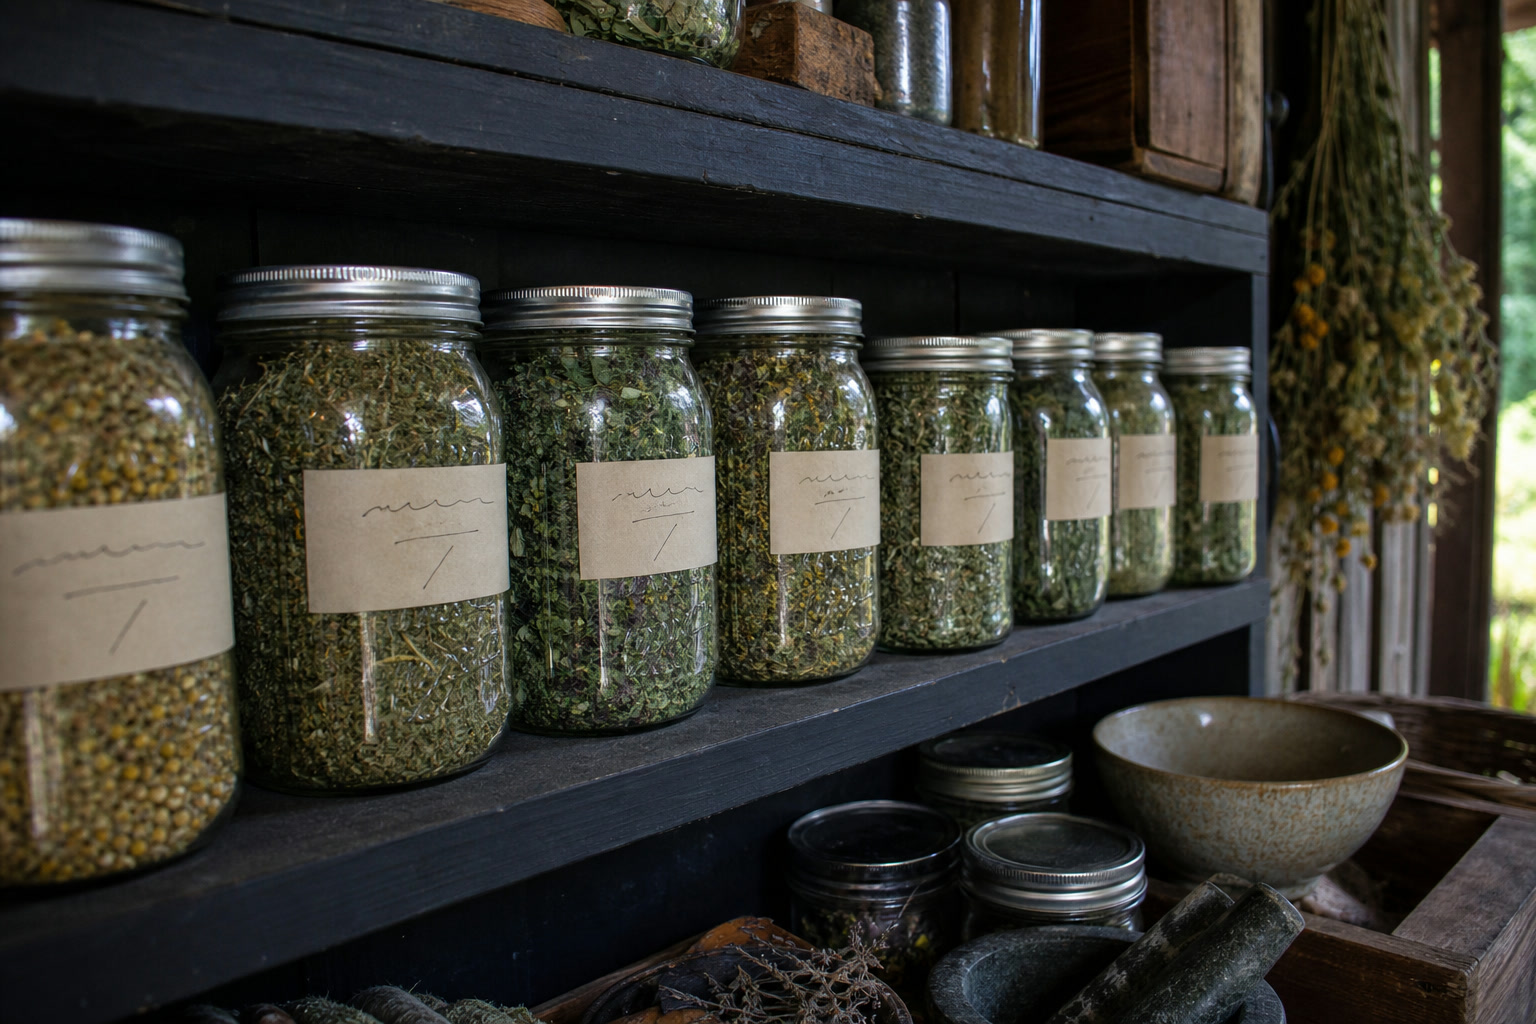
All the careful drying in the world comes apart in bad storage. Light, heat, and air are what fade a dried herb back toward worthless. I store everything in wide-mouth mason jars, packed but not crushed, sealed tight, labeled with the plant and the date, and kept in a dark cupboard away from the stove. The wide mouth means I can get a measuring spoon in and out without breaking the leaves to powder on the rim.
For the first few days after jarring, I watch for condensation on the inside of the glass. Any fog means there was still water in the herb — back to the rack or the trays it goes before it spoils the lot. Properly dried and properly stored, most leafy herbs hold their strength for a year, roots and bark longer. I’m usually opening the last of one season’s nettle right about when the new crop comes up in March.
The drying is the easy half
Drying and storing are mechanical skills — a warm corner, a steady low heat, a tight jar, a watchful first week. The harder knowledge is which plant to gather, when its strength is highest, and how each one was traditionally used once it’s dry on your shelf.
That’s the heart of my book, Pacific Northwest Medicinal Plants — 115 wild herbs of this coast, when each is at its best, and how to put it up for the winter the way my grandmother’s generation did. The dehydrator and the jars keep the harvest. The book tells you what’s worth keeping.