How to Make Your First Herbal Tincture (Step by Step)
A step-by-step guide to making your first herbal tincture the old folk way — the four things you need, the ratio I use, and the mistakes I've made so you won't.
A tincture is just a plant soaked in alcohol until the alcohol pulls out what’s in the plant. That’s the whole secret. People sell it back to you in little brown bottles for the price of a steak dinner, and there is nothing in those bottles you can’t make on your own kitchen counter with a mason jar and a few weeks of patience.
I have been making tinctures the folk way — by eye, by feel, by the calendar on the wall rather than a scale — for most of thirty years. My grandmother kept hers in a cupboard above the stove where it stayed dark and warm, and I keep mine the same way. What follows is exactly how I’d walk a neighbor through their first batch standing in my kitchen. No clinical dosing, no promises about what it’ll do for you — that’s not my lane and it’s not the law’s, either. Just the traditional method, the way it’s been done a long time.
Pick your plant and your alcohol
Start with something forgiving. For a first tincture I’d point you toward nettle, dandelion root, or elderberry — plants that are easy to identify, easy to find, and hard to confuse with anything dangerous. I dig dandelion root in October when the plant has pulled its energy down for winter, and I cut nettle in March before it flowers. The plant decides the calendar; you just have to show up.
For the alcohol, plain 80-proof vodka does almost everything a beginner needs. It’s 40 percent alcohol, which is strong enough to keep the tincture from spoiling and gentle enough to work with fresh or dried material. Higher-proof grain alcohol pulls more out of resinous roots and bark, but it’s harder to find and easy to overdo. Vodka first. You can graduate later.
One honest word on identification, said once: tincture only what you can name with certainty, confirmed against more than one reliable source. Alcohol does not neutralize a poisonous plant. It concentrates whatever you put in the jar — the good and the bad both.
Prepare the plant
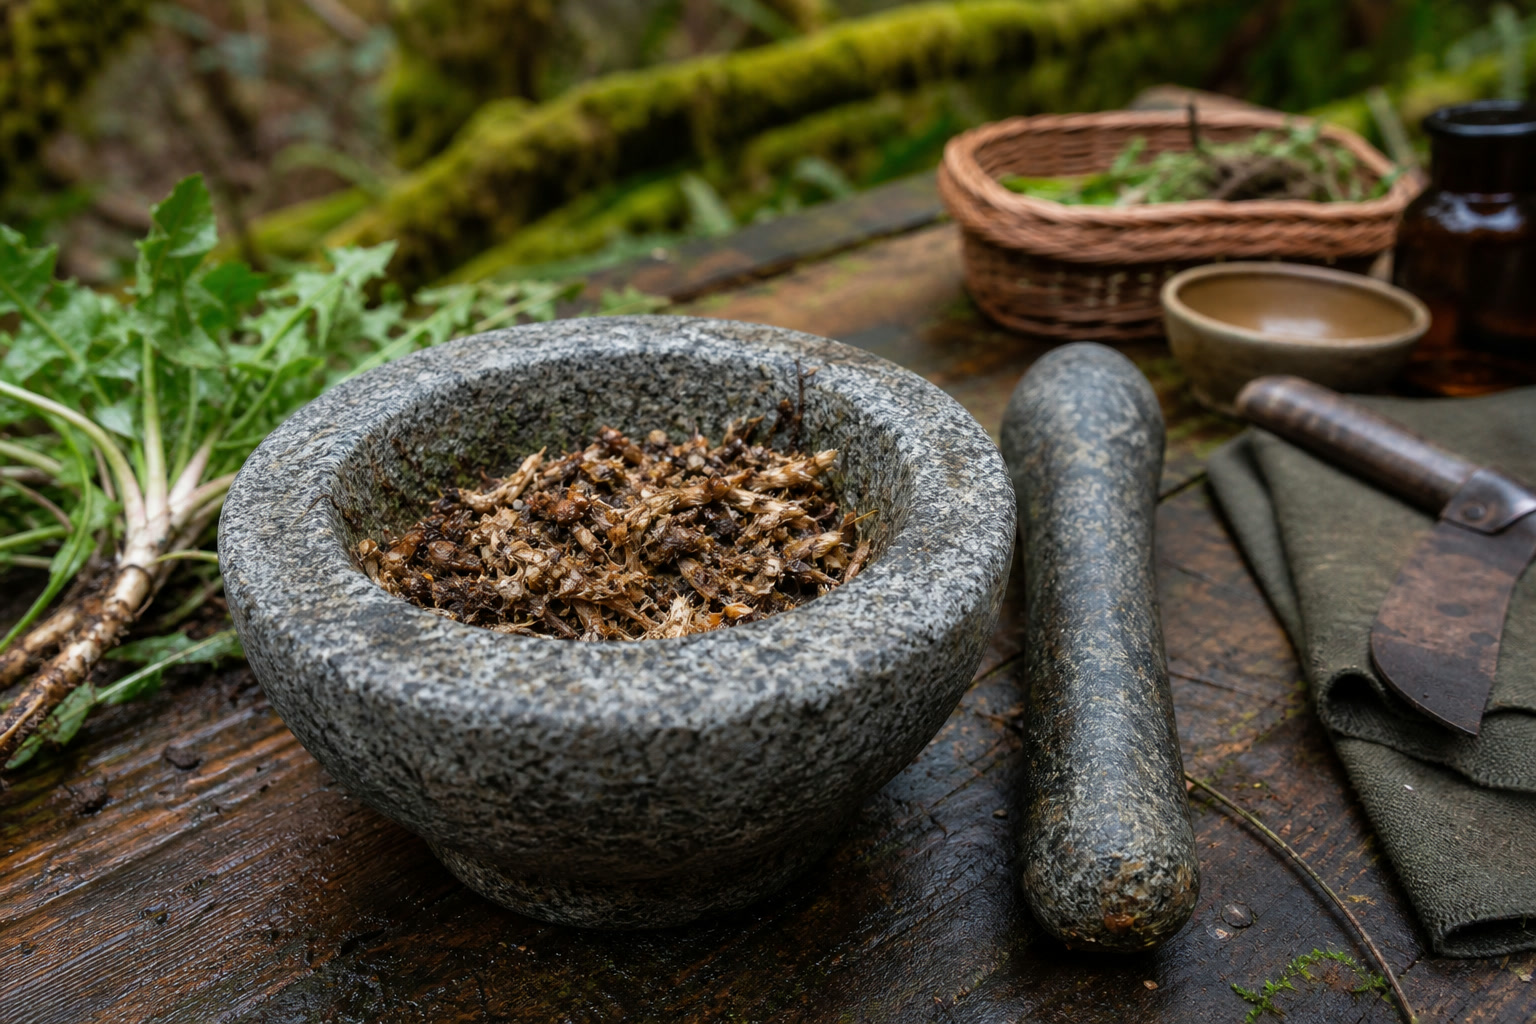
Fresh plant material goes in chopped small; the more cut surface, the more the alcohol can reach. For tough roots and dried bark, I bruise the material first in a granite mortar and pestle — not to powder, just to crack it open so the cell walls give up their contents. A hand-cranked grinder works too, but I like the mortar. Thirty years of breaking roots by hand has its own rhythm, and the heavy granite does the work a lighter bowl can’t.
Dried plant material is the more reliable place to start. Fresh material carries water, and that water dilutes your alcohol below the level that keeps things shelf-stable. If you’re working fresh, lean on the vodka and don’t pack the jar so tight the liquid can’t move.
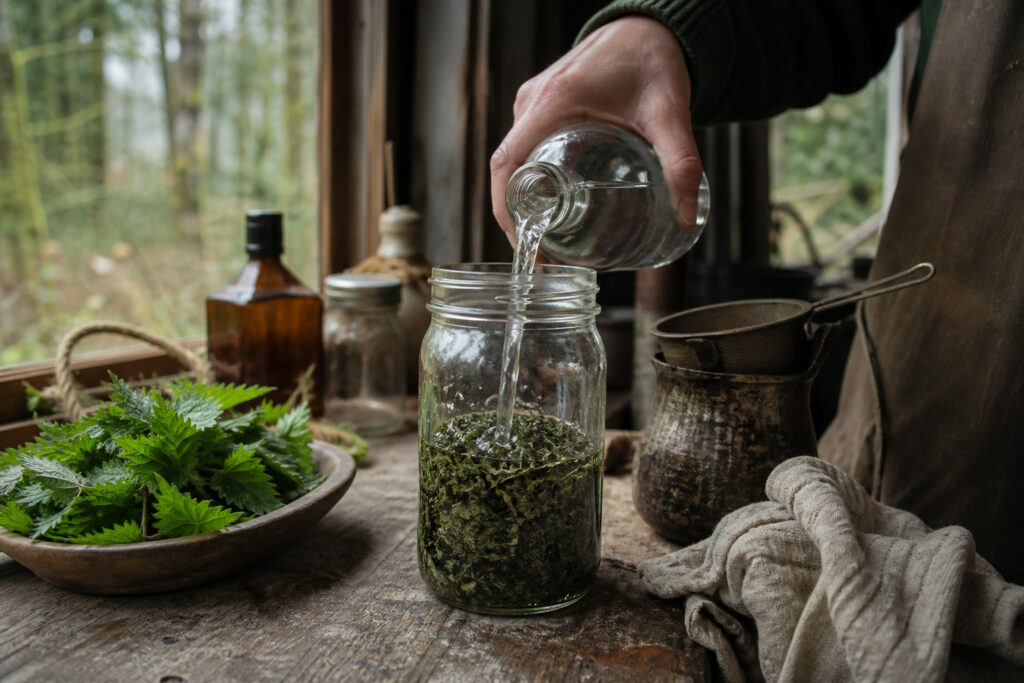
Fill the jar and cover it
Here’s where the wide-mouth mason jar earns its place. A narrow-mouth jar fights you on the way in and fights you worse on the way out, when the plant has swollen and locked itself against the shoulder of the glass. Wide mouth, every time.
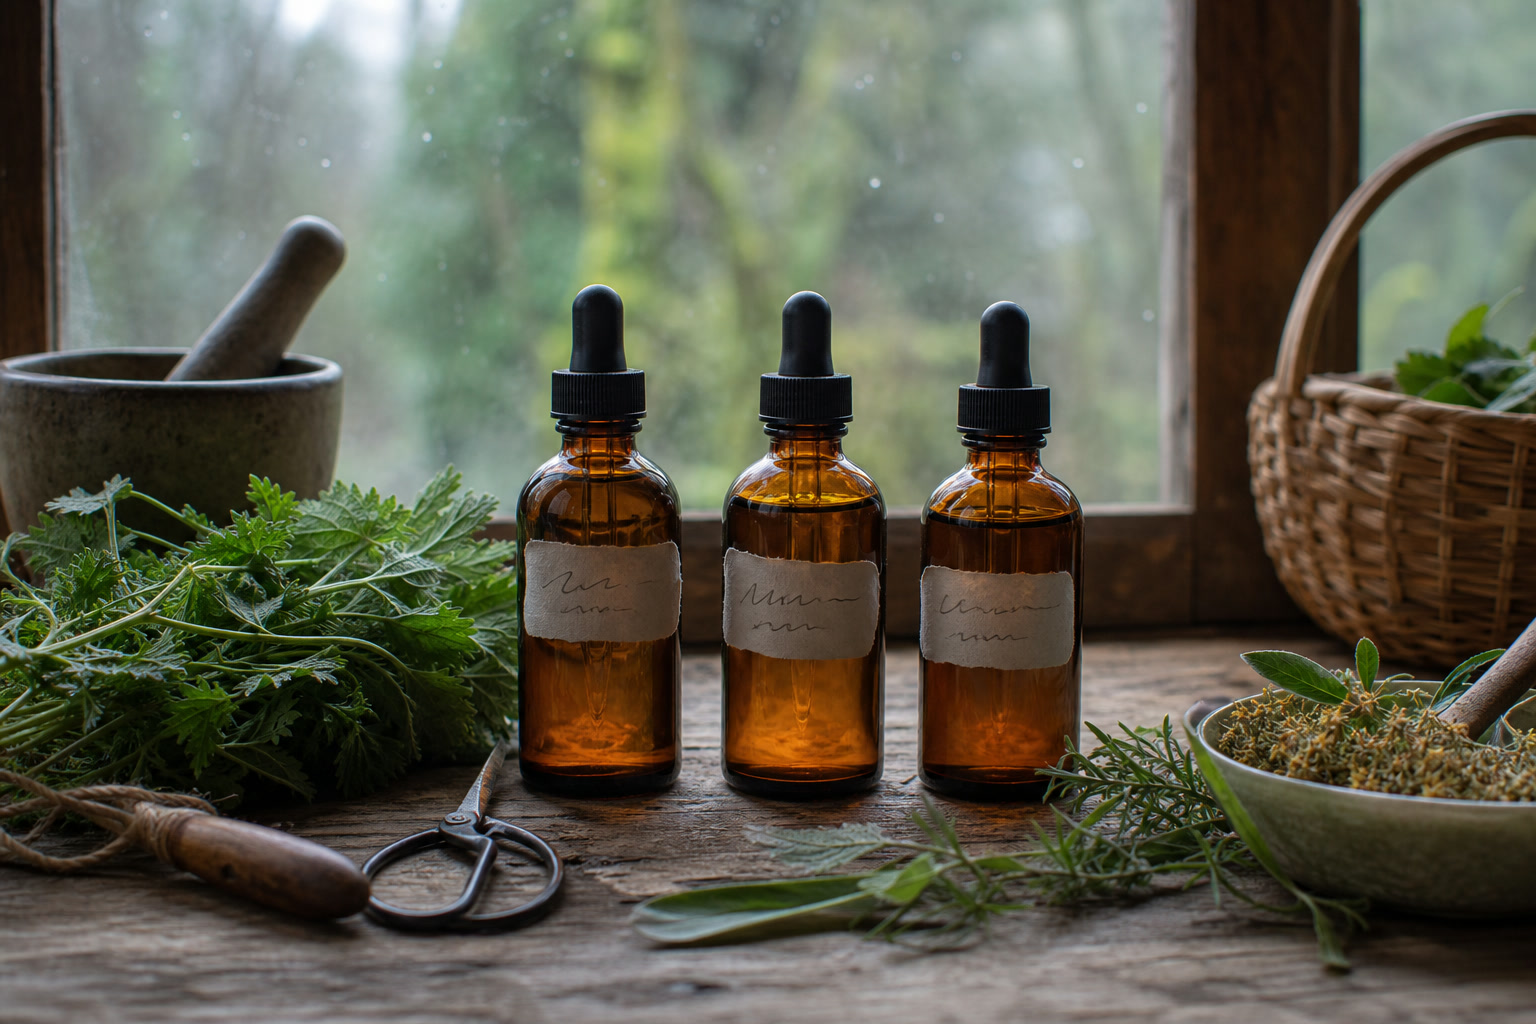
The folk ratio I use, and the one most beginners do well with: fill the jar about halfway to two-thirds with dried plant material (or pack it loosely full if you’re using fresh), then pour vodka over the top until the plant is fully submerged with an inch of liquid to spare. Plant material that pokes above the alcohol will mold, and mold ends the batch. If the plant swells and rises over the next day, top it off. Cap it, label it with the plant and the date — you will not remember in six weeks, I promise you — and set it somewhere dark.
Wait, shake, and wait some more
Now the work is mostly waiting. I shake my jars once a day for the first week or so, less after that, partly to keep everything submerged and partly because it gives me something to do while the kettle heats. Four to six weeks is the traditional window. Some people pull at two weeks and some go for months; I split the difference and call it done at six.
The tincture will darken as it goes. Nettle turns a deep green-black, elderberry a wine-dark purple, dandelion root a warm amber. That color is the visible proof the alcohol is doing its job.
Strain and bottle
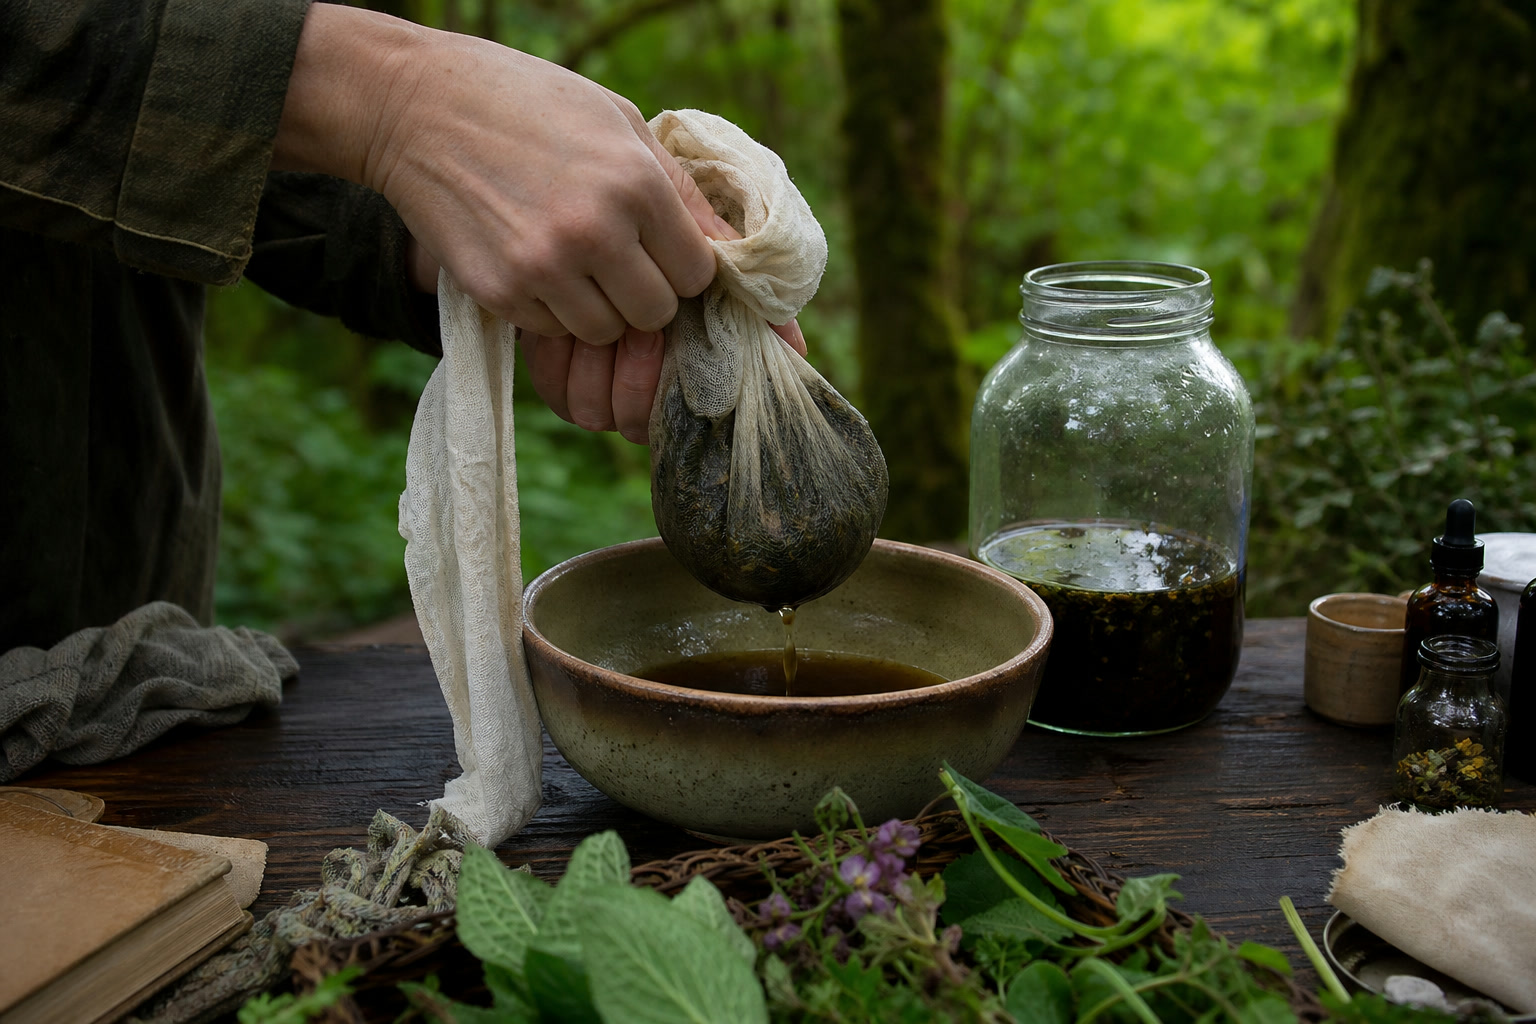
When the time’s up, line a bowl or a wide-mouth funnel with a doubled layer of grade-90 unbleached cheesecloth and pour the whole jar through. The grade-90 weave is tight enough to catch the fine sediment that a looser cheese cloth lets slip — and that sediment is exactly what made me lose most of a batch of elderberry tincture one fall, when I rushed the strain and the finished bottles went cloudy and started to turn. Gather the corners of the cloth and wring the soaked plant hard. There’s a surprising amount of tincture still hiding in there, and the last squeeze is the strongest.
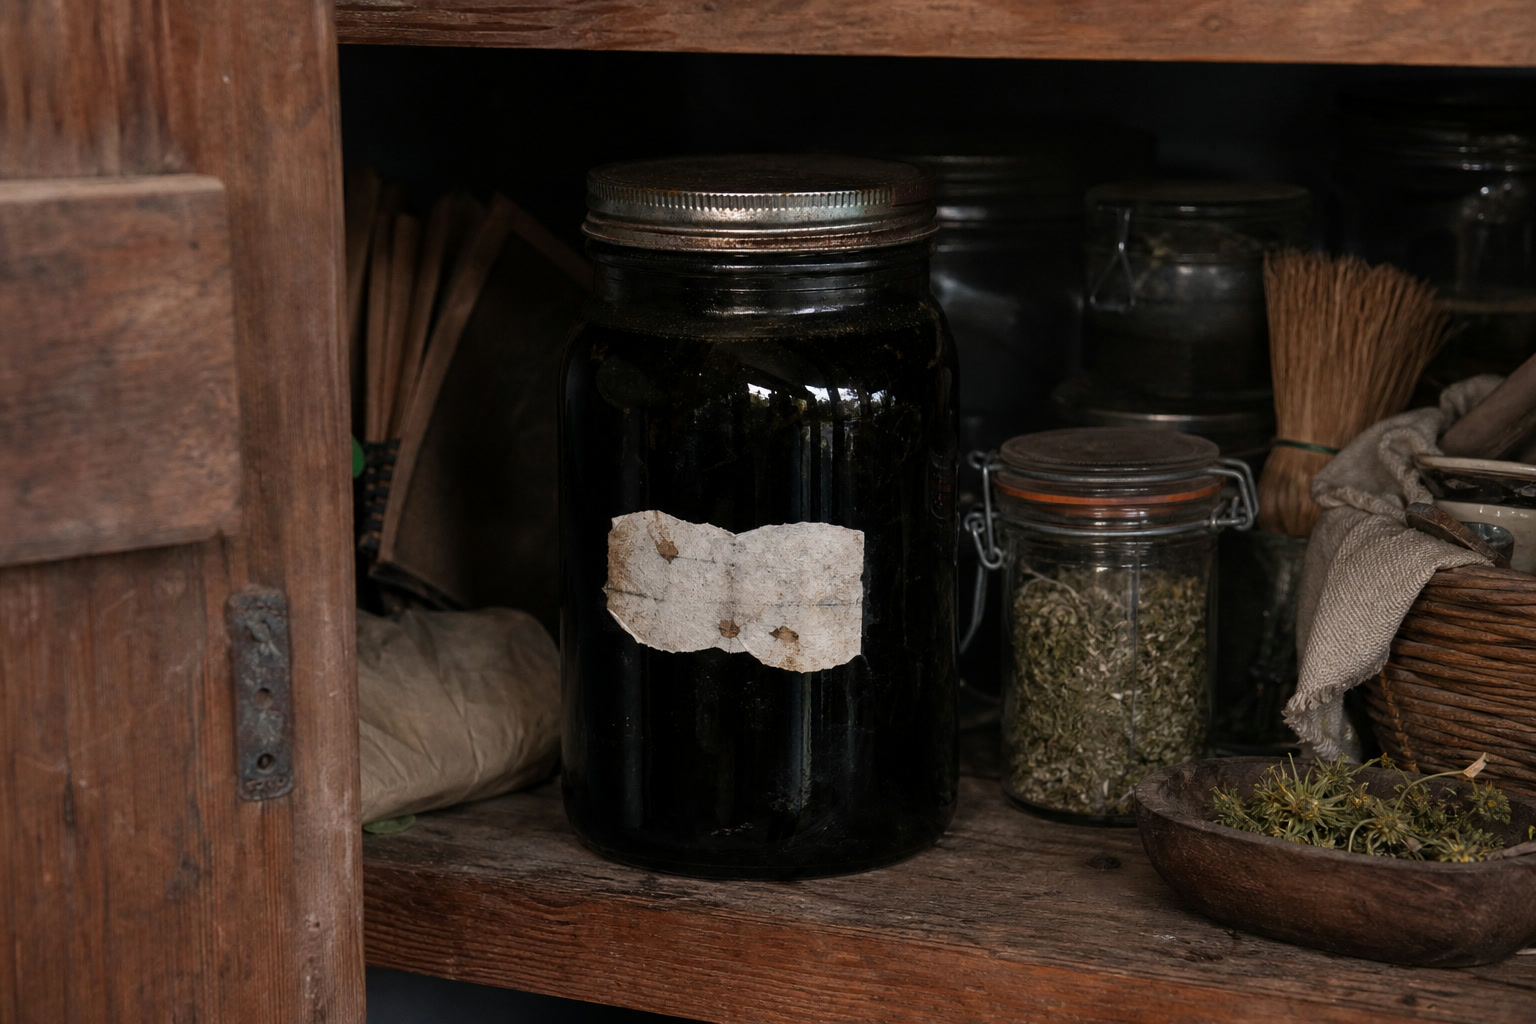
Pour the strained liquid into amber dropper bottles. Amber, not clear — light degrades a tincture faster than anything except heat, and the dark glass is the difference between a tincture that keeps for years and one that fades by spring. Label again. A tincture made well and stored in the dark will outlast the plant that’s growing outside your door.
Where the method ends and the knowing begins
The mechanics of a tincture take an afternoon to learn. Which plant to choose, when to harvest it, how each one was traditionally used and which ones don’t belong in a jar at all — that takes longer, and it’s the part I care most about.
It’s also most of what I put into my book, Pacific Northwest Medicinal Plants — 115 wild herbs of this coast, how to identify each one without guessing, when to gather it, and how the generations before us prepared it. The jar and the vodka are the easy part. The book is how you know what to put in them.